
How to Use GPT-2 to Generate Text from Custom Models

What is GPT-2?
Created by OpenAI, GPT-2 is a better language model created using machine learning to generate text from a simple prompt. A version of their AI was released on github, allowing individuals who are interested in AI and machine learning access to their project.
There is no better place to become acquainted with this project and the implications than to read it from the source. If you are interested in learning more, click the LINK to read the article written by OpenAI.
The simple explanation of the project is that GPT-2 lets you input a prompt and receive AI written text in return. The base models of the project can be trained on data you provide, resulting in higher quality, and more specific text generation results.
This article is designed to help you get the project up and running on your computer so you can begin testing out GPT-2.
Install Python3 and Anaconda Navigator
Python and the package dependencies of this project have updated dramatically since it’s initial release. As a result, it is difficult to get it up and running without first creating a virtual environment that has python 3.6 installed. The best solution is to use Anaconda to create a virtual environment specific for this projects needs. As well, you need to have Python3 installed on your computer. If you have not done so, visit python.org and download the most recent version.
Anaconda.org and the Anaconda Navigator:
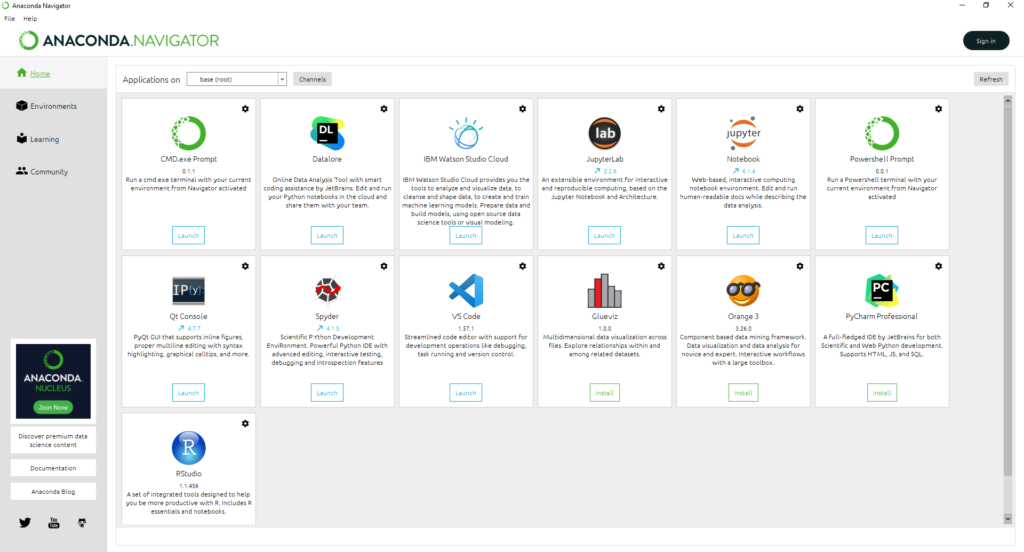
Visit Anaconda.org and download the free navigator. You will also need to sign in or create an account. This will let you access previous versions of python which is required for creating a python 3.6.13 environment.
Install GPT-2 on Your Computer
The following video will walk you through creating the virtual anaconda environment, installing GPT-2, and running the text gen AI for the first time.
Here are the commands used in the video:
Windows Users – install Linux commands on Anaconda:
conda install m2-baseAll Users – install git commands on Anaconda:
conda install -c anaconda gitMake sure your environment has Python 3.6 installed:
python --version
python3.6.13
Create a folder for the project and clone repository:
$ mkdir openai
$ cd openai
path-to/openai/
$ git clone https://github.com/nshepperd/gpt-2.git && cd gpt-2
Note: You can view the original installation documentation HERE
Install Dependencies:
pip install tensorflow==1.14.0Note: the github repository for gpt-2 has install instructions for the dependencies which want you to download tensorflow==1.12.0 which I have changed above. The 1.14.0 version is compatible with both the base models for text generation and is crucial to using custom models. Without this version, something will not work and this can be frustrating. So as a general rule, install with the command above.
Install Dependencies:
pip install -r requirements.txtor install packages individually
pip install fire>=0.1.3
pip install regex==2017.4.5
pip install requests==2.21.0
pip install tqdm==4.31.1
pip install toposort==1.5
Downloading Model Data:
python download_model.py 124M
python download_model.py 117M
Other Models Available:
python download_model.py 355M
python download_model.py 774M
python download_model.py 1558M
Run the Interactive Sample to Verify Installation:
python src/interactive_conditional_samples.py --top_k 40If the model prompt launches, you can begin generating text. To exit the script, use ^C
How to Create Custom Models for Text Generation
Here are the commands used in the video:
Prepare Text to Create Custom Dataset and Model:
Create a .txt file and copy text you would like to use into the file. Place the .txt into the root folder (gpt-2 folder) and save.
Create a new file using your terminal with the following:
touch filename.txtNote: If you copy text from several articles, and would like to break up the content so the AI learns from each piece individually, rather than collectively, paste the following code between text lines or sections in your .txt file.
<|endoftext|>Larger datasets of 50,000 to 100,000 words will create complex models that return spectacular results. The more data (words) you have, the longer you should train on the data. The reverse is also true. If you have smaller datasets, you are not required to train as much. To begin learning, compose a .txt file with 10,000 words and run 1,000 steps of training on it. Afterwards, test the text generation AI on the new model. Analyses the results and repeat.
The more familiar you become with GPT-2, the easier it will become to create models that fit your specific needs. We will be creating a more in-depth video and article about GPT-2 to display our own findings which we will link to below as soon as it becomes available.
Advanced GPT-2 Video & Article (Coming Soon)
Convert Dataset and Launch Training:
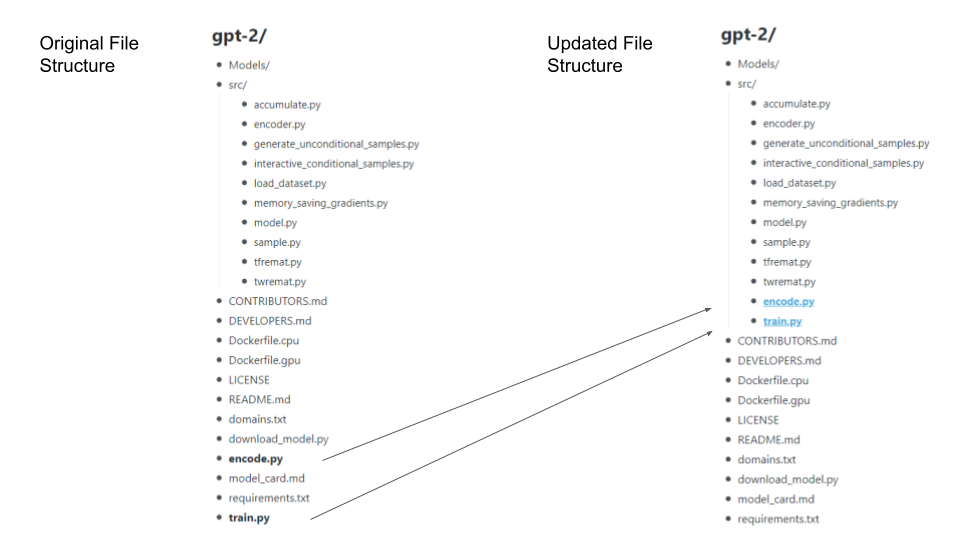
Before we continue, make a copy of train.py and encode.py, and put them in the src/ folder. If they are not moved, you will get an error stating that the files are not found. This is a flaw in the repository which we download above. Here is an example of the file structure you should have.
Encode TXT file:
python src/encode.py name.txt name.npzThis will convert your .txt file to an .npz file. The .npz file is used by the scripts to train the AI on your data. Again, make sure the files are in the root file (gpt-2) or it will throw an error.
Train Model from Custom Dataset:
python src/train.py --dataset name.npzGenerate additional samples during training:
python src/train.py --dataset name.npz --sample_every 50 --sample_num 3Note: You will have a sample generated every 100 steps automatically, which is more often than not, sufficient. However, as shown above, you can update this should you wish to see more examples of progress as you train.
Stop Training: CTRL + C (^C) which will save a checkpoint and close the training program.
Resume Training from previous checkpoint:
python src/train.py --dataset name.npzCreate Model Folder from Trained Data:
Go to your checkpoint/run1 folder, and make a copy of the following files:
- checkpoint
- model-xxx.data-00000-of-00001
- model.xxx.index
- model.xxx.meta
Note: xxx refers to the step number, which will reflect the most recent save. You may see more than one version of each. This lets you use data trained with a lower step count. Just be sure to copy the files with the same number.
Go to your Models folder and create a new folder, give it the same name as your .txt file, and past the copied files. Then, go to the 124M model folder and copy the following files:
- encoder.json
- hparams.json
- vocab.bpe
Paste the copied files into the new model folder you just created. Now you can use your trained data as a model for GPT-2.
Generating Samples from Custom Model:
python src/generate_unconditional_samples.py --model_name dataNote: data is a placeholder for the folder name you gave to your model.
python src/interactive_conditional_samples.py --model_name dataAdditional params to set:
python src/interactive_conditional_samples.py --temperature 0.8 --top_k 40 --model_name dataTop_k is the Integer value determining diversity.
Temperature is the parameter used to control the randomness of predictions.
What’s Next?
Here are a few resources to get you started with machine learning, python, and coding: